A beginner-friendly blog that teaches the basics of woodworking, from selecting the right tools and materials to building your first project.

Monday, March 20, 2023

Build Storage Shed DIY Instructional

Posted by with No comments
Build Storage Shed DIY

Step 1: Determine Shed Size and Style

  • Consider what items you will be storing and how much space you will need
  • Research various shed styles and choose one that fits your needs and aesthetic preferences then lets continue to Build Storage Shed

Step 2: Select Materials and Foundation Type

  • Choose from common shed building materials such as wood, metal, or vinyl
  • Decide on a foundation type, such as a concrete slab or wood frame with a skid foundation

Step 3: Prepare Foundation

  • Clear and level the area where the shed will be built
  • If building on a concrete slab, pour and level the concrete according to local building codes
  • If building on a wood frame, lay down a layer of gravel and install concrete pier blocks at each corner and at regular intervals along the perimeter of the frame

Step 4: Build the Frame

  • Using the shed plans, measure and cut lumber to the appropriate size
  • Assemble the frame according to the shed plans

Step 5: Install Siding and Roofing

  • Cut and install the siding according to the shed plans
  • Cut and install the roofing material, ensuring proper overlap and fastening

Step 6: Add Doors and Windows

  • Install the doors and windows according to the shed plans
  • Ensure that they are properly secured and sealed against the weather

Step 7: Install Interior Sheathing

  • Measure and cut interior sheathing material to fit the walls and ceiling of the shed
  • Install the sheathing, making sure to leave room for electrical wiring and insulation if desired

Step 8: Finish the Shed

  • Trim and paint or stain the shed to your desired finish
  • Add any additional features or accessories, such as shelving, hooks, or lighting

Step 9: Organize the Shed

  • Place items in the shed in an organized and efficient manner
  • Consider adding labels or storage containers to keep items easily accessible and visible

Step 10: Enjoy Your New Storage Space!

  • Use your new shed to store tools, equipment, or other items
  • Enjoy the added space and organization in your outdoor area

Materials List

Before starting your shed project, it's important to gather all necessary materials. Here's a list of materials you'll need:
  • Pressure-treated 4x4s for the foundation
  • 2x4s for framing the walls, roof, and door
  • Exterior grade plywood for sheathing
  • Roofing materials, such as shingles or metal roofing
  • Exterior grade siding or cladding material
  • Windows and door
  • Nails and screws
  • Construction adhesive and sealant
  • Paint or stain

Plans and Diagrams

To help you visualize the shed project and ensure proper construction, it's important to have detailed plans and diagrams. You can find these online or in books, or you may choose to create your own. Here are some common shed plans:
  • Gable roof shed
  • Lean-to shed
  • Barn-style shed
  • Colonial-style shed

Additional Tips

Here are some additional tips to keep in mind as you build your storage shed:
  • Always wear safety gear, such as goggles and gloves
  • Consult local building codes and obtain necessary permits before starting construction
  • Consider hiring a professional if you're unsure about any part of the construction process
  • Take your time and don't rush the project, as mistakes can be costly and time-consuming to fix
  • Enjoy the process and the satisfaction of creating your own outdoor storage space!
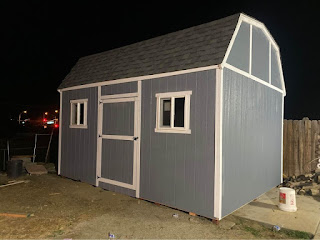
By following these step-by-step instructions, gathering necessary materials, and obtaining detailed plans and diagrams, you can build your own storage shed and enjoy the added space and organization in your outdoor area.

PDF Materials List and Plans

To make things easier, we have provided a downloadable PDF materials list and plans for a 10x10 storage shed. This shed is perfect for beginners and provides ample storage space.  

Conclusion

Building your own storage shed can be a fun and rewarding project. With the right materials, plans, and guidance, even beginners can successfully construct a shed for their outdoor storage needs. Remember to take your time, follow each step carefully, and always prioritize safety. By following these instructions and tips, you'll have a new storage shed in no time!

Thursday, March 16, 2023

Woodworking project plans for outdoor furniture

Posted by with No comments
When it comes to outdoor spaces, a well-decorated patio is an absolute must-have. Outdoor furniture is an essential part of creating the perfect ambiance and functionality for the space. Instead of buying ready-made patio furniture, why not try building your own? With woodworking project plans for outdoor furniture, you can create a unique space tailored to your taste and style. To start building your dream patio, you'll need to gather the materials and tools necessary for the project. Make sure to choose wood that is suitable for outdoor use, such as cedar or teak, which are resistant to rot and weather. You'll also need basic woodworking tools such as a saw, drill, and sandpaper. Once you have all the necessary materials and tools, it's time to dive into the project plans. Don't be intimidated if you're new to woodworking! The plans will guide you through each step of the process, and with patience and attention to detail, you'll have a beautiful piece of outdoor furniture in no time. To make sure your project goes smoothly, here is a step-by-step guide to building your own outdoor furniture.

Expand Instruct Guide

  1. Choose your project: Select a project from the woodworking project plans for outdoor furniture that suits your needs and skill level. Some popular options include Adirondack chairs, garden benches, and picnic tables.
  2. Gather materials: As mentioned earlier, choose wood that is suitable for outdoor use, and gather all the necessary tools.
  3. Measure and cut wood: Use a saw to cut the wood into the appropriate lengths and sizes according to the plan's instructions.
  4. Assemble the pieces: Use screws and wood glue to join the pieces together. Be sure to follow the plan's instructions carefully to ensure a secure and sturdy construction.
  5. Sand and stain: Sand down any rough edges or surfaces, and apply a protective stain or sealant to protect the wood from the elements.

Material List

Here are some of the materials you'll need for your outdoor furniture project:
  • Wood (cedar, teak, or other suitable outdoor wood)
  • Screws
  • Wood glue
  • Sandpaper
  • Stain or sealant
Refer to the specific project plan for a detailed list of materials and quantities.

Plans

The woodworking project plans for outdoor furniture come in various styles and designs, catering to different tastes and skill levels. Here are a few examples:
  • Adirondack chairs: This classic design features wide armrests, a sloping seat, and a high backrest. It's perfect for relaxing outdoors and taking in the view.
  • Garden benches: A garden bench is a simple yet elegant addition to any outdoor space. It's great for seating multiple people and creating a cozy atmosphere.
  • Picnic tables: A picnic table is a versatile piece of outdoor furniture that can be used for outdoor meals, games, and gatherings. It's also a fun DIY project that the whole family can enjoy.
No matter what project you choose, be sure to follow the plan's instructions carefully and take your time to create a beautiful and functional piece of outdoor furniture. With woodworking project plans for outdoor furniture, you can create a personalized and unique patio that reflects your style and preferences. Don't be afraid to get creative and experiment with different designs and finishes. Building your own outdoor furniture is a rewarding and enjoyable experience that will leave you with a beautiful and functional space for years to come. Happy woodworking!

Tuesday, March 14, 2023

Picnic Perfection: Build Your Own 8ft Table!

Posted by with No comments

Are you tired of searching for the perfect picnic table? Why not build your own? With an 8ft table, you'll have plenty of space for all your summer gatherings. Not to mention, building your own outdoor furniture can be a fun and rewarding project. In this article, we'll provide a step-by-step guide, material list, and plans for building your own 8ft picnic table.

Step-by-Step Guide

Step 1: Gather your materials. You'll need several pieces of lumber, screws, and a saw. We recommend using pressure-treated pine to ensure your table will last through many outdoor seasons.

Step 2: Cut your lumber to size. You'll need two 8ft boards for the tabletop, two 6ft boards for the seats, and four 4ft boards for the legs.

Step 3: Assemble the tabletop. Lay the two 8ft boards parallel to each other and secure them with screws. Then, attach the two 6ft boards perpendicular to the tabletop boards.

Step 4: Attach the legs. Place two legs at each end of the table, making sure they are flush with the edges. Secure them with screws.

Step 5: Reinforce the table. Attach additional lumber between the legs for added stability.

Step 6: Sand and finish. Sand the table to remove any rough edges and apply a weather-resistant finish to protect it from the elements.

Material List

  • Pressure-treated pine lumber: 2x8 boards (2), 2x6 boards (2), 2x4 boards (4)
  • Screws
  • Saw
  • Sandpaper
  • Weather-resistant finish

Plans

We've included detailed plans for building your own 8ft picnic table. These plans will guide you through each step of the process and ensure your table is built to perfection.

With these plans and materials, you'll be well on your way to building your own perfect picnic table.

There you have it! Building your own 8ft picnic table is a fun and rewarding project that will provide you with a sturdy and reliable outdoor seating option for years to come. With our step-by-step guide, material list, and plans, you'll be able to create your own perfect picnic table in no time. Happy building!


Sunday, March 12, 2023

Affordable woodworking project ideas

Posted by with No comments

Woodworking is a great way to express your creativity and make something useful with your own hands. But it can also be an expensive hobby, with the cost of materials and tools adding up quickly. That's why we've put together a list of 10 affordable woodworking project ideas that won't break the bank. Whether you're a beginner or an experienced woodworker, these DIY projects are perfect for every skill level and budget.

Get Inspired: 10 Affordable Woodworking Project Ideas!

  1. Wooden Planter Box: A wooden planter box is a great way to add some greenery to your home or garden. It's a simple project that can be completed in a weekend, and all you need is some wood, screws, and a few basic tools.

Materials:

  • 2x4 lumber
  • 1x6 lumber
  • Screws
  • Wood glue

Instructions:

  1. Cut the 2x4 lumber into 4 equal pieces for the legs.

  2. Cut the 1x6 lumber into 4 pieces for the sides of the box.

  3. Screw the legs to the sides to create a frame.

  4. Cut slats for the bottom of the box and screw them into the frame.

  5. Sand the edges and corners to avoid splinters.

  6. Rustic Coat Rack: A coat rack is a must-have in any home, and this rustic version adds a touch of charm to your entryway. It's a simple project that requires minimal tools and materials.

Materials:

  • 1x6 lumber
  • Coat hooks
  • Screws
  • Wood glue

Instructions:

  1. Cut the 1x6 lumber into the desired length for your coat rack.

  2. Sand the edges and corners to avoid splinters.

  3. Attach the coat hooks evenly spaced on the board.

  4. Screw the board onto the wall at the desired height.

  5. Floating Shelves: Floating shelves are a modern and minimalist way to display your favorite items. They're easy to make and can be customized to fit any space.

Materials:

  • 1x8 lumber
  • Shelf brackets
  • Screws
  • Wood glue

Instructions:

  1. Cut the 1x8 lumber into the desired length for your shelves.
  2. Sand the edges and corners to avoid splinters.
  3. Attach the shelf brackets to the wall at the desired height.
  4. Screw the shelves onto the brackets.
  5. Use wood glue to secure the shelves to the brackets for added strength.

Woodworking on a Budget: DIY Projects for Every Skill Level!

  1. Wine Rack: A wine rack is a great way to store and display your favorite bottles. This simple version can be made with just a few materials and tools.

Materials:

  • 1x4 lumber
  • Screws
  • Wood glue

Instructions:

  1. Cut the 1x4 lumber into 4 equal pieces for the sides.

  2. Cut slats for the bottom of the wine rack and screw them into the sides.

  3. Sand the edges and corners to avoid splinters.

  4. Stain or paint the wine rack to match your decor.

  5. Picture Frame: A handmade picture frame adds a personal touch to your home decor. This simple version can be made with just a few materials and tools.

Materials:

  • 1x2 lumber
  • Glass
  • Backing board
  • Picture hangers
  • Screws
  • Wood glue

Instructions:

  1. Cut the 1x2 lumber into 4 pieces for the frame.

  2. Sand the edges and corners to avoid splinters.

  3. Assemble the frame with wood glue and screws.

  4. Insert the glass and backing board.

  5. Attach picture hangers to the back of the frame.

  6. Serving Tray: A serving tray is a useful and decorative item for any home. This simple version can be made with just a few materials and tools.

Materials:

  • 1x4 lumber
  • Handles
  • Screws
  • Wood glue

Instructions:

  1. Cut the 1x4 lumber into the desired length and width for your tray.
  2. Sand the edges and corners to avoid splinters.
  3. Attach the handles to the sides of the tray with screws.
  4. Stain or paint the tray to match your decor.

These affordable woodworking project ideas are just the beginning. With a little creativity and some basic tools, you can make anything from furniture to home decor. So, what are you waiting for? Get started on your next project today!


Saturday, March 11, 2023

Woodworking project plans for outdoor furniture

Posted by with No comments
When it comes to outdoor spaces, a well-decorated patio is an absolute must-have. Outdoor furniture is an essential part of creating the perfect ambiance and functionality for the space. Instead of buying ready-made patio furniture, why not try building your own? With woodworking project plans for outdoor furniture, you can create a unique space tailored to your taste and style. To start building your dream patio, you'll need to gather the materials and tools necessary for the project. Make sure to choose wood that is suitable for outdoor use, such as cedar or teak, which are resistant to rot and weather. You'll also need basic woodworking tools such as a saw, drill, and sandpaper. Once you have all the necessary materials and tools, it's time to dive into the project plans. Don't be intimidated if you're new to woodworking! The plans will guide you through each step of the process, and with patience and attention to detail, you'll have a beautiful piece of outdoor furniture in no time. To make sure your project goes smoothly, here is a step-by-step guide to building your own outdoor furniture.

Expand Instruct Guide

  1. Choose your project: Select a project from the woodworking project plans for outdoor furniture that suits your needs and skill level. Some popular options include Adirondack chairs, garden benches, and picnic tables.
  2. Gather materials: As mentioned earlier, choose wood that is suitable for outdoor use, and gather all the necessary tools.
  3. Measure and cut wood: Use a saw to cut the wood into the appropriate lengths and sizes according to the plan's instructions.
  4. Assemble the pieces: Use screws and wood glue to join the pieces together. Be sure to follow the plan's instructions carefully to ensure a secure and sturdy construction.
  5. Sand and stain: Sand down any rough edges or surfaces, and apply a protective stain or sealant to protect the wood from the elements.

Material List

Here are some of the materials you'll need for your outdoor furniture project:
  • Wood (cedar, teak, or other suitable outdoor wood)
  • Screws
  • Wood glue
  • Sandpaper
  • Stain or sealant
Refer to the specific project plan for a detailed list of materials and quantities.

Plans

The woodworking project plans for outdoor furniture come in various styles and designs, catering to different tastes and skill levels. Here are a few examples:
  • Adirondack chairs: This classic design features wide armrests, a sloping seat, and a high backrest. It's perfect for relaxing outdoors and taking in the view.
  • Garden benches: A garden bench is a simple yet elegant addition to any outdoor space. It's great for seating multiple people and creating a cozy atmosphere.
  • Picnic tables: A picnic table is a versatile piece of outdoor furniture that can be used for outdoor meals, games, and gatherings. It's also a fun DIY project that the whole family can enjoy.
No matter what project you choose, be sure to follow the plan's instructions carefully and take your time to create a beautiful and functional piece of outdoor furniture. With woodworking project plans for outdoor furniture, you can create a personalized and unique patio that reflects your style and preferences. Don't be afraid to get creative and experiment with different designs and finishes. Building your own outdoor furniture is a rewarding and enjoyable experience that will leave you with a beautiful and functional space for years to come. Happy woodworking!

Wednesday, March 8, 2023

Picnic Perfect DIY Table

Posted by with No comments

Do you want to have an outdoor picnic table that reflects your unique style and personality? Look no further! In this step-by-step guide, we will show you how to create your own dream picnic table that is perfect for outdoor parties. This DIY project is not only affordable, but it is also a fun and creative way to spend your weekend. So, let's get started!

Create Your Own Dream Picnic Table

Material List:

  • 6 pieces of 2x4x8 lumber
  • 4 pieces of 2x6x8 lumber
  • 2 1/2 inch screws
  • Drill
  • Saw
  • Measuring tape
  • Wood glue
  • Sandpaper

Step-by-Step Guide:

  1. Cut the 2x4x8 lumber into four 6-foot pieces for the table legs and four 3-foot pieces for the frame.
  2. Cut the 2x6x8 lumber into two 6-foot pieces and five 3-foot pieces for the tabletop and seats.
  3. Assemble the table frame by attaching the 3-foot pieces to the legs using wood glue and screws.
  4. Attach the tabletop and seats to the frame using wood glue and screws.
  5. Sand the table and seats until they are smooth.
  6. Enjoy your new picnic table!

How to Make a Picnic Table that is Perfect for Outdoor Parties

Material List:

  • 8 pieces of 2x4x8 lumber
  • 6 pieces of 2x6x8 lumber
  • 3 1/2 inch screws
  • Drill
  • Saw
  • Measuring tape
  • Wood glue
  • Sandpaper

Step-by-Step Guide:

  1. Cut the 2x4x8 lumber into four 6-foot pieces for the table legs and four 4-foot pieces for the frame.
  2. Cut the 2x6x8 lumber into two 6-foot pieces and five 4-foot pieces for the tabletop and seats.
  3. Assemble the table frame by attaching the 4-foot pieces to the legs using wood glue and screws.
  4. Attach the tabletop and seats to the frame using wood glue and screws.
  5. Cut a 2x6x8 piece of lumber into two 6-foot pieces for the cross braces.
  6. Attach one cross brace to the table legs using wood glue and screws.
  7. Attach the second cross brace to the seat frame using wood glue and screws.
  8. Sand the table and seats until they are smooth.
  9. Enjoy your new picnic table at your next outdoor party!

There you have it, two different ways to make your own dream picnic table. Whether you want a simple table for your backyard or a more elaborate one for outdoor parties, these step-by-step guides have got you covered. So, grab your tools and get ready to create something beautiful and functional that you can enjoy for years to come!


Monday, March 6, 2023

Rustic woodworking project tutorials

Posted by with No comments

Crafting Country Charm: Rustic Woodworking Projects

If you're looking to add some country charm to your home décor, then rustic woodworking projects might just be the perfect way to do it. Rustic wood décor can add warmth and character to any room, and it's a style that's easy to achieve with a little bit of woodworking know-how. In this article, we'll take you through some step-by-step tutorials to create your own rustic wood projects.

Rustic Wooden Shelves

Rustic wooden shelves are a great way to add some storage space to your home while also bringing in some natural charm. Here's what you'll need:

Materials

  • Reclaimed wood
  • Saw
  • Sandpaper
  • Screws
  • Drill
  • Measuring tape
  • Level

Instructions

  1. Measure and cut your wood to the desired length and width.
  2. Sand the wood down to remove any rough edges or splinters.
  3. Drill pilot holes into the wood where you want to attach the brackets.
  4. Attach the brackets to the wall using screws and a level.
  5. Place the wood onto the brackets and secure with screws.

Rustic Wood Picture Frames

Rustic wood picture frames are a great way to showcase your favorite photos while adding some country charm to your décor. Here's what you'll need:

Materials

  • Reclaimed wood
  • Saw
  • Sandpaper
  • Wood glue
  • Picture hangers
  • Measuring tape

Instructions

  1. Measure and cut your wood to the desired length and width for your frame.
  2. Sand the wood down to remove any rough edges or splinters.
  3. Cut out an opening in the wood where you want to display your picture.
  4. Apply wood glue to the back of your picture frame and attach your picture.
  5. Attach picture hangers to the back of the frame.

A Beginner's Guide to Creating Cozy Wood Décor

===INTRO: If you're new to woodworking, then cozy wood décor might be a great place to start. Not only is it easy to create, but it's also a style that's perfect for adding warmth and comfort to any room. In this section, we'll walk you through some beginner-friendly tutorials to create your own cozy wood décor.

Rustic Wood Candle Holders

Rustic wood candle holders are a simple but stunning addition to any room. Here's what you'll need:

Materials

  • Reclaimed wood
  • Saw
  • Sandpaper
  • Drill
  • Spade drill bit
  • Decorative knobs

Instructions

  1. Measure and cut your wood to the desired length and width for your candle holder.
  2. Sand the wood down to remove any rough edges or splinters.
  3. Drill a hole into the center of your wood using a spade drill bit.
  4. Screw in your decorative knob to the top of your wood.
  5. Place your candle inside the hole and enjoy!

Rustic Wood Wall Art

Rustic wood wall art is an easy way to add some personality to your walls. Here's what you'll need:

Materials

  • Reclaimed wood
  • Saw
  • Sandpaper
  • Paint
  • Paintbrush
  • Picture hangers

Instructions

  1. Measure and cut your wood to the desired length and width for your wall art.
  2. Sand the wood down to remove any rough edges or splinters.
  3. Choose a design or phrase to paint onto your wood.
  4. Paint your design onto the wood using a paintbrush.
  5. Attach picture hangers to the back of the wood and hang on your wall.

With these beginner-friendly tutorials, you'll be able to create cozy and charming wood décor in no time. Whether you're looking to add some storage space or a little bit of personality to your walls, rustic woodworking projects are a great place to start. Happy woodworking!


Saturday, March 4, 2023

Squirrel Delight: Build Your Own Mini Picnic Table!

Posted by with No comments

Attention all squirrel lovers! Do you love watching these cute furry creatures scamper around your yard? Do you want to provide them with a fun and unique dining experience? Then it's time to build your own mini picnic table! Not only will it bring joy to your squirrel friends, but it will also add a touch of whimsy to your backyard. So let's get started!

Calling All Squirrel Lovers!

First things first, let's gather all the materials we'll need. For the tabletop and seats, you'll need a piece of wood measuring 1 foot by 2 feet. For the legs, you'll need four wooden dowels measuring 8 inches each. You'll also need wood glue, screws, a power drill, and a saw. Don't forget to grab some paint and brushes to add some color to your new creation!

Once you have all your materials, it's time to create a plan. The table should be about 2 feet off the ground, and the seats should be placed on either side of the tabletop. Make sure to measure and cut your wood pieces accordingly, and pre-drill holes for the screws. Use wood glue to attach the legs to the tabletop and seats, and then secure them with screws. Once everything is attached, it's time to paint and decorate your new mini picnic table!

Get Ready to Build Your Furry Friends a Picnic Table!

Now that you have your plan and materials, it's time to start building! Begin by cutting your wood pieces to size and sanding any rough edges. Then, using wood glue and screws, attach the legs to the tabletop and seats. Make sure everything is level and secure before moving on to the next step.

Once the table is assembled, it's time to add some color! Use your paint and brushes to create a fun and unique design. You can even add some squirrel-friendly snacks like nuts or seeds to the table to entice your furry friends. Place the table in a shaded area where squirrels can easily access it, and sit back and watch as they enjoy their new dining experience!

And there you have it, a step-by-step guide to building your own mini picnic table for squirrels! Not only is it a fun and creative project to work on, but it also provides a unique way to interact with nature. So gather your materials, get building, and enjoy watching your squirrel friends dine in style! {WRITING_STYLE} Cheers to squirrel delight!


Friday, March 3, 2023

Simple woodworking project plans for beginners

Posted by with No comments

Creative and Cheerful Woodworking for Beginners!

Woodworking is a fun and creative way to build something unique and practical for your home or office. However, it can be hard to know where to start if you're new to the craft. That's why we've put together this beginner-friendly guide to simple woodworking project plans. You'll find step-by-step instructions, material lists, and plans for easy projects that even newbies can tackle. So let's get started and get crafty!

Get Crafty: Easy Woodworking Projects for Newbies!

Step 1: Build a Wooden Birdhouse

Building a wooden birdhouse is a classic woodworking project that's perfect for beginners. You'll need a few basic tools and materials, such as a saw, hammer, nails, and wood glue. Follow these simple steps to build your birdhouse:

  • Cut your wood pieces according to the plan.
  • Use wood glue and nails to assemble the pieces.
  • Add a roof and a perch, and drill a hole for the entrance.
  • Sand and paint your birdhouse.

Step 2: Create a Wooden Picture Frame

Making a wooden picture frame is another easy project that's both practical and beautiful. You'll need some wooden boards, a saw, sandpaper, stain or paint, and some picture hanging hardware. Here's how to do it:

  • Cut your wood pieces to the right size.
  • Sand the edges and corners to smooth them out.
  • Stain or paint your frame to match your decor.
  • Add the picture hanging hardware to the back.

Woodworking 101: Beginner-Friendly Plans to Try Today!

Step 1: Build a Wooden Bench

Building a wooden bench is a bit more complex than the first two projects, but it's still beginner-friendly. You'll need some lumber, a saw, a drill, screws, and a sander. Follow these steps to make your bench:

  • Cut your wood pieces to the right length and width.
  • Drill holes and screw the pieces together to form the legs, seat, and backrest.
  • Sand the bench to smooth out any rough spots.
  • Stain or paint your bench for a finished look.

Step 2: Make a Wooden Serving Tray

A wooden serving tray is a great project that's both practical and beautiful. You'll need some wooden boards, a saw, sandpaper, a drill, screws, and some handles. Here's how to do it:

  • Cut your wood pieces to the right size.
  • Drill holes and screw the pieces together to form the base and sides of the tray.
  • Sand the tray to smooth out any rough spots.
  • Attach the handles to the sides of the tray.

Happy Woodworking!

We hope you've found these simple woodworking project plans helpful and inspiring. Remember, woodworking is a fun and creative way to express yourself and make something useful. With a little practice and patience, you'll soon be building your own custom furniture and decor. Happy woodworking!


Thursday, March 2, 2023

DIY woodworking projects for home improvement

Posted by with No comments

Easy DIY Woodworking Projects for Home Improvement

Are you looking for simple DIY woodworking projects that can enhance your home's appearance and functionality? Look no further! In this article, we've compiled a list of easy woodworking projects that you can complete in a few hours or less. With the right tools and materials, even beginners can create beautiful and functional pieces that will impress their friends and family. So, let's get started!

1. Wooden Wall Shelves

Materials:

  • 1x4 pine boards
  • Wood glue
  • 2-inch wood screws
  • Sandpaper
  • Stain or paint

Tools:

  • Circular saw
  • Drill
  • Measuring tape
  • Level
  • Screwdriver

Instructions:

  1. Cut the pine boards to the desired length for your shelves.
  2. Sand the boards to remove any rough edges or splinters.
  3. Apply wood glue to the edges of the boards and attach them together to create a rectangular shape.
  4. Use the drill and wood screws to secure the corners of the shelves.
  5. Sand the shelves to make them smooth.
  6. Stain or paint the shelves to match your home decor.
  7. Use a level to install the shelves securely on the wall.

2. Side Table with Hairpin Legs

Materials:

  • 1x8 pine board
  • Hairpin legs
  • Wood glue
  • Screws
  • Sandpaper
  • Stain or paint

Tools:

  • Circular saw
  • Drill
  • Measuring tape

Instructions:

  1. Cut the pine board to the desired length for your side table.
  2. Sand the board to remove any rough edges or splinters.
  3. Attach the hairpin legs to the bottom of the board using screws and wood glue.
  4. Sand the table to make it smooth.
  5. Stain or paint the table to match your home decor.

3. Wooden Blanket Ladder

Materials:

  • 2x4 pine boards
  • Wood glue
  • Screws
  • Sandpaper
  • Stain or paint

Tools:

  • Circular saw
  • Drill
  • Measuring tape

Instructions:

  1. Cut the pine boards to the desired length for your ladder rungs.
  2. Sand the boards to remove any rough edges or splinters.
  3. Attach the rungs to the side supports using screws and wood glue.
  4. Sand the ladder to make it smooth.
  5. Stain or paint the ladder to match your home decor.

With these easy DIY woodworking projects, you can transform your home with beautiful and functional pieces that you made yourself. These projects are perfect for beginners and can be completed in just a few hours. By following our step-by-step instructions and using the right tools and materials, you'll be able to create stunning pieces that will impress your friends and family. So, get to work and start making your dream home a reality! Writing style: Instructive. Tone: Neutral.


Wednesday, March 1, 2023

Free woodworking project plans for kids

Posted by with No comments

Get Your Kids Crafting with Free Woodworking Projects!

Are you looking for a fun and creative way to get your kids involved in woodworking? Look no further than these free woodworking project plans for kids! With easy-to-follow instructions and a list of materials, these projects are perfect for beginners and seasoned crafters alike. From building a birdhouse to creating a wooden game, there's something for everyone in this guide.

Fun, Easy, and Free: Woodworking Projects for Kids!

Woodworking can be a great way to spark creativity and imagination in children. Not only does it teach them valuable skills like measuring and cutting, but it also allows them to express themselves by creating something unique and personal. With these free woodworking project plans for kids, your little ones can get started on their own crafts and projects in no time.

Materials List

Before you get started on any project, it's important to gather all the necessary materials. Here's what you'll need for these woodworking projects:

  • Hand saw or jigsaw
  • Hammer
  • Sandpaper
  • Screws and nails
  • Wood glue
  • Drill
  • Safety goggles
  • Wood pieces (specific measurements outlined in project plans)

Instruct Guide and Plans

Now that you have your materials, it's time to get started on the fun part - crafting! Below are step-by-step instructions and plans for three easy woodworking projects for kids:

  1. Birdhouse: This simple project is perfect for beginners. All you'll need to do is cut out the pieces of wood according to the measurements in the plans, and then assemble them using screws and wood glue. Add a coat of paint or stain to make it your own!

  2. Wooden Game: For a more challenging project, try building a wooden game like tic-tac-toe or a maze. The plans will outline the measurements and steps needed to create the game board and pieces. This project may require a jigsaw or drill, so make sure to supervise your child closely.

  3. Step Stool: This project is perfect for older children who are ready for a more complex challenge. The step stool plans will guide you through cutting and assembling the pieces, and will require the use of a hand saw, drill, and screws. Add a coat of paint or stain to match your child's room!

With these free woodworking project plans for kids, your little ones can discover a new hobby and develop valuable skills. Whether they're building a birdhouse or a step stool, each project allows them to unleash their creativity and imagination. So gather your materials and get crafting today!


Tuesday, February 28, 2023

DIY woodworking projects on a budget

Posted by with No comments

DIY Woodworking Projects on a Budget

Woodworking can be a satisfying and fulfilling hobby, but it can also be expensive. However, with a little creativity and resourcefulness, it's possible to create beautiful pieces without breaking the bank. In this article, we'll explore some affordable woodworking projects for beginners and provide step-by-step instructions, material lists, and plans to guide you through the process.

Affordable woodworking projects for beginners

Rustic wooden coasters

These rustic wooden coasters are a great project for beginners. They're easy to make and require minimal tools and materials. Here's what you'll need:

  • 4x4 wooden blocks (you can find these at your local hardware store)
  • Sandpaper (80-120 grit)
  • Wood stain or paint
  • Clear polyurethane spray

To make the coasters, follow these steps:

  1. Cut the wooden blocks into 4-inch squares.
  2. Sand the edges and surfaces of the blocks with sandpaper.
  3. Apply the wood stain or paint to the blocks and let dry.
  4. Apply a coat of clear polyurethane spray to seal the wood.

Wooden planter box

A wooden planter box is a great way to add some green to your home or garden. Here's what you'll need:

  • 1x6 or 2x6 wooden boards
  • Saw
  • Drill
  • Wood screws
  • Sandpaper (80-120 grit)
  • Wood stain or paint
  • Clear polyurethane spray

To make the planter box, follow these steps:

  1. Cut the wooden boards to the desired length and width.
  2. Drill pilot holes for the screws and assemble the box.
  3. Sand the edges and surfaces of the box with sandpaper.
  4. Apply the wood stain or paint to the box and let dry.
  5. Apply a coat of clear polyurethane spray to seal the wood.

How to create beautiful pieces without breaking the bank

Wooden picture frame

A wooden picture frame is a simple but elegant way to display your favorite photos. Here's what you'll need:

  • Wooden boards (cut to desired size)
  • Saw
  • Sandpaper (80-120 grit)
  • Wood stain or paint
  • Clear polyurethane spray
  • Picture frame hardware

To make the picture frame, follow these steps:

  1. Cut the wooden boards to the desired size.
  2. Sand the edges and surfaces of the boards with sandpaper.
  3. Apply the wood stain or paint to the boards and let dry.
  4. Assemble the boards into a frame using picture frame hardware.
  5. Apply a coat of clear polyurethane spray to seal the wood.

Wooden bookends

Wooden bookends are a practical and attractive addition to any bookshelf. Here's what you'll need:

  • Wooden blocks (cut to desired size)
  • Saw
  • Sandpaper (80-120 grit)
  • Wood stain or paint
  • Clear polyurethane spray

To make the bookends, follow these steps:

  1. Cut the wooden blocks to the desired size.
  2. Sand the edges and surfaces of the blocks with sandpaper.
  3. Apply the wood stain or paint to the blocks and let dry.
  4. Apply a coat of clear polyurethane spray to seal the wood.

With these affordable woodworking projects, you can create beautiful pieces without breaking the bank. Remember to take your time, use proper safety precautions, and enjoy the process!


DIY woodworking project ideas

Posted by with No comments

Creative Woodworking Projects for a Cheerful Home

Are you ready to get crafty? Woodworking is a great way to create unique and personalized items for your home, and it doesn't have to be a daunting task. With a little creativity and some basic tools, you can make beautiful and functional items that will add character and warmth to your living space. In this article, we'll share 10 DIY woodworking project ideas that are easy to follow and use materials that can be found at your local hardware store. So grab your tools and let's get started!

Get Crafty: 10 DIY Woodworking Project Ideas!

1. Rustic Wooden Picture Frames

Turn your favorite photos into works of art with these rustic wooden picture frames. All you need is some reclaimed wood, a saw, sandpaper, nails, and a little bit of creativity. Cut the wood to the desired size, sand it down to give it a weathered look, and assemble the pieces using nails. Add some twine or wire to the back for hanging, and you have a unique and charming frame that will showcase your memories.

2. Farmhouse Bench

Add some rustic charm to your entryway or dining room with this DIY farmhouse bench. Using basic lumber and a Kreg jig, you can create a sturdy and stylish bench that will make a statement in any room. Cut the pieces to size, drill the pocket holes, and assemble using screws. Finish with a coat of stain or paint, and you have a beautiful and functional piece of furniture.

3. Wood Slice Coasters

Keep your drinks from leaving rings on your tables with these adorable wood slice coasters. Gather some fallen tree branches, slice them into 1/4 inch rounds, and sand them down. Add a coat of polyurethane to protect the wood, and you have a set of coasters that will add a touch of nature to your home decor.

4. Hanging Plant Shelf

Bring some greenery into your home with this DIY hanging plant shelf. Using a few pieces of lumber and some rope, you can create a stylish and functional shelf that will display your favorite plants. Cut the lumber to size, drill the holes, and assemble using twine or rope. Hang it from the ceiling or a sturdy hook, and enjoy the beauty of nature indoors.

5. Wooden Spoon Set

Upgrade your kitchen utensils with this handmade wooden spoon set. Using a lathe and a block of wood, you can create a set of spoons that are both functional and beautiful. Sand them down to a smooth finish, and seal with food-grade mineral oil for a long-lasting and safe finish.

6. Wine Rack

Store your favorite bottles of wine in style with this DIY wine rack. Using some basic lumber, a saw, and a drill, you can create a customized wine rack that will fit your space and your style. Cut the pieces to size, drill the holes, and assemble using screws. Finish with a coat of stain or paint, and you have a functional and stylish piece of furniture.

7. Wooden Planters

Add some greenery to your home with these DIY wooden planters. Using some basic lumber and a few tools, you can create customized planters that will showcase your favorite plants. Cut the pieces to size, drill the drainage holes, and assemble using screws. Finish with a coat of stain or paint, and you have a unique and charming planter that will add character to your home decor.

8. Wooden Crate Shelves

Create some extra storage space with these DIY wooden crate shelves. Using some wooden crates and a few pieces of lumber, you can create customized shelves that will fit your space and your style. Stack the crates and attach them with screws, and add the shelves using brackets or dowels. Finish with a coat of stain or paint, and you have a functional and stylish storage solution.

9. Chalkboard Sign

Add some personality to your home with this DIY chalkboard sign. Using some plywood, chalkboard paint, and a few tools, you can create a customized sign that will showcase your personality and style. Cut the plywood to size, paint with chalkboard paint, and attach a frame using brackets or dowels. Finish with some chalk art, and you have a unique and colorful sign that will add character to your home.

10. Wooden Toy Blocks

Create some fun and educational toys for your kids with these DIY wooden toy blocks. Using some scrap lumber and a saw, you can create a set of blocks that will inspire creativity and imagination. Cut the pieces to size, sand them down to a smooth finish, and add some fun designs using paint or markers. Your kids will love playing with their own personalized set of blocks.

Turn Your Home into a Cozy Oasis with These Woodworking Projects!

1. Blanket Ladder

Keep your cozy blankets organized and within reach with this DIY blanket ladder. Using some basic lumber and a saw, you can create a stylish and functional ladder that will add charm to your living space. Cut the pieces to size, assemble using screws or dowels, and finish with a coat of stain or paint.

2. Rustic Wall Art

Add some character to your walls with this DIY rustic wall art. Using some weathered wood, a saw, and some basic tools, you can create a unique and charming piece of art that will add warmth to your living space. Cut the wood to size, sand it down to give it a weathered look, and add some fun designs using paint or stencils.

3. Wooden Candle Holders

Create a cozy atmosphere with these DIY wooden candle holders. Using some scrap lumber and a drill, you can create customized candle holders that will add warmth and charm to your decor. Cut the pieces to size, drill the holes for the candles, and add some fun designs using paint or markers.

4. Wooden Serving Tray

Serve your guests in style with this DIY wooden serving tray. Using some basic lumber and a few tools, you can create a customized tray that will showcase your style and personality. Cut the pieces to size, assemble using screws or dowels, and finish with a coat of stain or paint.

5. Wood Slice Wall Clock

Keep track of time with this unique and charming DIY wood slice wall clock. Using some tree branches, a clock mechanism, and some basic tools, you can create a one-of-a-kind clock that will add character to your living space. Slice the branches into 1/4 inch rounds, sand them down, and add the clock mechanism. Finish with some fun designs using paint or markers.

Get Creative with Woodworking

Woodworking is a fun and rewarding hobby that allows you to create personalized and unique items for your home. With these DIY woodworking project ideas, you can get creative and add some charm and warmth to your living space. Whether you're a beginner or an experienced woodworker, these projects are easy to follow and use materials that can be found at your local hardware store. So grab your tools, get creative, and enjoy the satisfaction of creating something beautiful and functional for your home.


Monday, February 27, 2023

Craft Your Own Cozy Adirondack Bench: DIY Plans!

Posted by with No comments

Get Cozy: Craft Your Own Adirondack Bench!

Are you looking for a way to spruce up your outdoor living space? Look no further than crafting your very own Adirondack bench! This cozy and classic design is perfect for relaxing in nature, whether you're enjoying a morning cup of coffee or unwinding after a long day. With our step-by-step DIY plans, you can easily create your own Adirondack bench and add a touch of comfort to your backyard.

Step-by-Step Guide

Creating your own Adirondack bench is easier than you might think! Follow our step-by-step guide for a stress-free crafting experience.

  1. Gather materials: The first step in crafting your own Adirondack bench is to gather all the necessary materials. You'll need wood boards (preferably cedar), screws, nails, sandpaper, and a saw. For more specific measurements and materials, refer to our plans.

  2. Cut the pieces: Once you have all your materials, it's time to start cutting the pieces for your bench. Follow our plans for precise measurements and cuts.

  3. Sand the pieces: After cutting your pieces, sand them down until they're smooth to the touch. This will ensure that your bench is comfortable to sit on.

  4. Assemble the bench: Now it's time to put all the pieces together! Refer to our plans for step-by-step instructions.

  5. Finishing touches: Once your bench is assembled, give it a final sanding and apply a coat of sealant to protect it from the elements.

Material List

To make your own Adirondack bench, you'll need the following materials:

  • Wood boards (preferably cedar)
  • Screws
  • Nails
  • Sandpaper
  • Saw

Refer to our plans for more specific measurements and materials.

Plans

Our plans provide step-by-step instructions and precise measurements for creating your own Adirondack bench. Follow them closely for a stress-free crafting experience.

  • Step 1: Gather materials
  • Step 2: Cut the pieces
  • Step 3: Sand the pieces
  • Step 4: Assemble the bench
  • Step 5: Finishing touches

With these plans and materials, you'll have your very own Adirondack bench in no time!

Crafting your own Adirondack bench is a fun and rewarding experience. With our step-by-step guide, material list, and plans, you can create a cozy and stylish addition to your outdoor living space. So grab your tools and get crafting!


Get Ready to Party on the Perfect Octagonal Picnic Table!

Posted by with No comments

Get Ready to Party on the Perfect Octagonal Picnic Table!

Are you ready to take your outdoor entertaining to the next level? Look no further than the ultimate party accessory: the octagonal picnic table! With its unique shape and ample seating, it's the perfect addition to any backyard bash. In this step-by-step guide, we'll show you how to build your own octagonal picnic table, complete with a material list and plans. So let's get started!

Step-by-Step Guide:

  1. Gather your materials. You'll need 8 pieces of 2x4 lumber, each 6 feet long, as well as 8 pieces of 2x6 lumber, also 6 feet long. You'll also need a circular saw, a drill, and some screws.

  2. Cut your lumber. Using the circular saw, cut each piece of 2x4 lumber into 4 pieces, each 18 inches long. Then, cut each piece of 2x6 lumber into 8 pieces, each 18 inches long.

  3. Build the frame. Using your drill and screws, attach the 2x4 pieces together to form the frame of the table. Then, attach the 2x6 pieces to the top of the frame, making sure they are evenly spaced.

  4. Add the legs. Cut 8 pieces of 4x4 lumber, each 2 feet long. Attach one to each corner of the frame using your drill and screws.

  5. Add the seats. Cut 8 pieces of 2x6 lumber, each 5 feet long. Attach them to the frame, one on each side, using your drill and screws.

  6. Finish the table. Sand down any rough edges or splinters, and then apply a coat of sealant or paint to protect the wood from the elements.

Material List:

  • 8 pieces of 2x4 lumber, each 6 feet long
  • 8 pieces of 2x6 lumber, each 6 feet long
  • 8 pieces of 4x4 lumber, each 2 feet long
  • Screws
  • Circular saw
  • Drill

Plans:

  • Cut each piece of 2x4 lumber into 4 pieces, each 18 inches long
  • Cut each piece of 2x6 lumber into 8 pieces, each 18 inches long
  • Build the frame using the 2x4 pieces
  • Attach the 2x6 pieces to the top of the frame, evenly spaced
  • Attach the 4x4 pieces to each corner of the frame
  • Attach the 2x6 pieces to the frame for seating
  • Sand and finish the table

With your new octagonal picnic table, you'll be the envy of all your friends and family at your next outdoor party. Not only is it functional and comfortable, but it's also a stylish addition to any backyard. So what are you waiting for? Get building!


Picnic Power: Crafting Your Own Dream Table!

Posted by with No comments

Crafting Your Own Dream Table for Picnicking Fun!

Picnics are a great way to enjoy the outdoors, and having a perfect picnic table can make them even better! What could be more enjoyable than creating your own dream table that is perfect for outdoor meals and games? In this article, we will provide a step-by-step guide on how to make your own picnic table that is both functional and stylish. With the right materials and plans, you can create a table that is perfect for any outdoor gathering.

Make Your Outdoor Meal a Feast for the Eyes!

The first step in creating your own dream picnic table is to think about the design. Do you want something simple and classic, or do you want something more elaborate and unique? Once you have a design in mind, you'll need to gather your materials. Some of the materials you'll need include wood, screws, a saw, a drill, and other basic tools.

Once you have all of your materials, you can begin building your dream table. Start by cutting and assembling the frame, making sure to use screws and other fasteners to secure everything in place. Once the frame is complete, you can then add the tabletop and bench seats. Sand everything down to ensure a smooth finish, and then paint or stain the table to match your desired style. Your outdoor meal will surely be a feast for the eyes with your new picnic table!

DIY Your Ideal Picnic Table and Transform Your Next Outing!

Creating your own picnic table is a fun and rewarding project that can transform your next outdoor gathering. With a little creativity and DIY skills, you can build the perfect table that will impress your guests and provide a comfortable and stylish dining experience.

When it comes to creating your dream table, there are endless possibilities. You can choose from different types of wood, finishes, and designs to create a table that perfectly fits your style and needs. With a solid plan and the right materials, you can create a table that will last for years to come and provide many memorable moments with friends and family.

Step-by-Step Guide:

  1. Choose your design and gather your materials
  2. Cut and assemble the frame
  3. Add the tabletop and bench seats
  4. Sand everything down and apply your desired finish
  5. Enjoy your new dream picnic table!

Materials List:

  • Wood (2x4s, 2x6s, etc)
  • Screws
  • Drills
  • Saws
  • Sandpaper
  • Paint or stain

Plans:

There are many different plans and designs available for building your own picnic table. Some popular options include traditional rectangular tables, round tables, and even hexagonal tables. It's important to choose a plan that is easy to follow and fits your skill level. Many plans are available online or at your local hardware store.

Start Crafting Your Dream Table Today!

Creating your own picnic table is a fun and rewarding project that can provide many enjoyable moments with friends and family. With the right materials and plans, you can create a table that is both functional and stylish. So why wait? Start crafting your dream table today and transform your next outdoor gathering into a memorable experience!


Wednesday, February 22, 2023

Picnic Perfect: Craft Your Own Table!

Posted by with No comments

Are you tired of using a flimsy, unstable picnic table that just won't cut it when it comes to outdoor dining? Why not take your picnic game to the next level by crafting your own table! Not only will you have a sturdy and reliable surface to enjoy your meals on, but you will also have the satisfaction of knowing you made it yourself. Follow this step-by-step guide to create a picnic perfect table that will impress all your guests.

Bring Your Picnic to the Next Level: Craft Your Own Table!

Step-by-Step Guide:

  1. Gather all the necessary materials. You will need:

    • 2x8 boards (quantity will depend on the size of your table)
    • 4x4 posts (quantity will depend on the size of your table)
    • Wood screws
    • Wood glue
    • Circular saw
    • Drill
    • Measuring tape
    • Sandpaper
    • Stain or paint (optional)
  2. Cut the 2x8 boards to the desired length for the table top. Sand the edges and surface of the boards until they are smooth.

  3. Cut the 4x4 posts to the desired height for the table legs. Sand the edges and surface of the posts until they are smooth.

  4. Create the frame for the table. Attach the legs to the table top using wood screws and wood glue. Make sure the legs are evenly spaced and level.

  5. Once the frame is complete, sand any rough edges or surfaces until they are smooth.

  6. If desired, apply stain or paint to the table to protect it from the elements and give it a finished look.

  7. Allow the table to dry completely before using it for your next picnic.

Material List:

  • 2x8 boards (quantity will depend on the size of your table)
  • 4x4 posts (quantity will depend on the size of your table)
  • Wood screws
  • Wood glue
  • Circular saw
  • Drill
  • Measuring tape
  • Sandpaper
  • Stain or paint (optional)

Plans:

  • Cut 2x8 boards to desired length
  • Cut 4x4 posts to desired height
  • Attach legs to table top using wood screws and wood glue
  • Sand rough edges and surfaces
  • Apply stain or paint (optional)

Get Creative and Make Your Next Picnic Perfect with Your Own Table!

Crafting your own picnic table not only adds a personal touch to your outdoor dining experience, but it also allows you to customize the table to your specific needs. Whether you want a table for four or ten, you can adjust the size and height to fit your preferences. Plus, you can choose the type of wood, stain or paint to match your existing outdoor decor.

So, grab your tools and get creative! With this step-by-step guide and a little bit of elbow grease, you can create a picnic perfect table that will make all your outdoor meals a memorable experience.

Crafting your own picnic table is a fun and rewarding project that will elevate your outdoor dining game. By following this step-by-step guide and using quality materials, you can create a sturdy and reliable surface that will last for years to come. So, let your creativity shine and have fun crafting your own picnic perfect table!


Monday, February 20, 2023

Woodworking project ideas for home decor

Posted by with No comments

Time to Get Crafty!=== If you're looking to add a touch of warm, natural charm to your home decor, woodworking is a fantastic way to do it. Whether you're a seasoned DIYer or a woodworking beginner, there are plenty of creative and simple projects that you can do to make your space feel cozy and inviting. From rustic picture frames to stylish shelving units, there's no limit to what you can create with a few basic tools and some quality wood. So let's get started with some woodworking project ideas that will make your home feel like a true retreat.

Craft Your Way to a Cozy Home: Woodworking Project Ideas for Decor!

When it comes to crafting your way to a cozy home, there are a ton of woodworking project ideas that you can try. Here are a few of our favorites:

Rustic Picture Frames

These simple frames are a great way to add a touch of rustic charm to any room in your home. To make them, you'll need some reclaimed wood, a saw, sandpaper, wood glue, and picture frame hangers. Cut your wood into pieces that are slightly larger than your photos, sand them down, and then glue them together to create a frame. Finish off with picture frame hangers and you're done!

Wood Pallet Coffee Table

If you're looking to add a unique and practical piece to your living room, a wood pallet coffee table is an excellent choice. All you need are some wood pallets, a saw, sandpaper, and some wood glue or screws to put it all together. Cut your pallets to size, sand them down, and then attach them together to create a sturdy table. You can also add a coat of stain or paint to make it match your decor.

Wooden Wall Shelves

Wooden wall shelves are a great way to add some extra storage or display space to your home. To make them, you'll need some wood planks, brackets, screws, and a drill. Cut your wood planks to size and sand them down, then attach the brackets to the wall and screw the planks onto the brackets. You can also add some decorative touches like paint or stenciling to make them stand out.

Reimagine Your Space with These Simple and Creative Woodworking Projects!

If you're ready to take your woodworking skills to the next level, try these more creative and challenging projects:

Wooden Headboard

A wooden headboard is a fantastic way to add some rustic charm to your bedroom. To make one, you'll need some wood planks, a saw, sandpaper, wood glue, and brackets to attach it to the bedframe. Cut your wood planks to size, sand them down, and then glue them together to create the headboard. Finish off with brackets to attach it to the bedframe.

Wood Pallet Bookshelf

A wood pallet bookshelf is a unique and practical addition to any room. All you need are some wood pallets, a saw, sandpaper, and some wood glue or screws to put it all together. Cut your pallets to size, sand them down, and then attach them together to create a sturdy bookshelf. You can also add a coat of stain or paint to make it match your decor.

Wood-burning Art

If you're feeling artistic, try your hand at wood-burning! This technique involves using a heated tool to burn designs or patterns onto a piece of wood. You can create anything from simple monograms to intricate landscapes. All you need is a wood-burning tool and a piece of wood to get started. Just be sure to practice on a scrap piece of wood first!

Get Creative!=== No matter what your skill level, woodworking is a great way to add a personal touch to your home decor. With these simple and creative project ideas, you can craft your way to a cozy and inviting space that you'll love to spend time in. So grab your tools and get started – the possibilities are endless!


Saturday, February 18, 2023

Creative woodworking project tutorials

Posted by with No comments

Let's Get Crafty: Fun Woodworking Tutorials!

If you're looking for a new hobby to get your creative juices flowing, woodworking might just be the perfect fit. With the right tools and materials, anyone can create beautiful projects that are both functional and decorative. In this article, we'll be sharing some creative woodworking project tutorials that are perfect for beginners and seasoned woodworkers alike. From building a simple birdhouse to crafting a stunning dining table, there's a project for everyone to enjoy. So let's get started!

Tutorial 1: Build a Rustic Wooden Planter

For this project, you'll need some basic woodworking tools like a saw, drill, and sander, as well as some cedar planks, screws, and a waterproof liner. The step-by-step guide will take you through the entire process, from measuring and cutting the wood to assembling and finishing the planter. You'll learn how to create a beautiful rustic look by distressing the wood and adding a weathered finish. This project is perfect for those who love gardening and want to add a handmade touch to their outdoor space.

Tutorial 2: Make a Wooden Serving Tray

If you're looking for a simple yet elegant project, this wooden serving tray is a great choice. You'll need a few pieces of hardwood, a saw, router, and some clamps to get started. The tutorial explains how to create a smooth and even surface by using a planer and how to shape the handles with a router. You can customize the design by choosing different types of wood and adding a personal touch with a wood-burning tool. This project is perfect for those who love to entertain and want to impress their guests with a handmade serving tray.

Tutorial 3: Build a Modern Bookshelf

For those who are ready to tackle a more complex project, this modern bookshelf is a great challenge. You'll need some plywood, hardwood, a circular saw, and a drill to get started. The tutorial explains how to create a unique and modern design using angled cuts and adjustable shelving. You can customize the size and shape of the bookshelf to fit your space and style. This project is perfect for those who love to read and want to showcase their book collection in a stylish and functional way.

Woodworking is a rewarding hobby that allows you to create beautiful and functional projects with your own two hands. Whether you're a beginner or a seasoned woodworker, these creative woodworking project tutorials are sure to inspire you. With detailed instructions, material lists, and plans, anyone can turn their woodworking dreams into reality. So grab your tools and get ready to craft something amazing!


Friday, February 17, 2023

DIY woodworking projects for outdoor furniture

Posted by with No comments

DIY Woodworking Projects for Outdoor Furniture

Outdoor furniture can be expensive, but with a little effort and creativity, you can make your own beautiful and functional pieces. Whether you're a seasoned woodworker or a beginner, there are plenty of easy DIY projects that you can tackle. In this article, we'll explore some of the best woodworking projects for outdoor furniture, complete with step-by-step instructions and materials lists.

Easy DIY Woodworking Projects for Outdoor Furniture

If you're new to woodworking, it's important to start with projects that are relatively simple and easy to complete. Here are a few ideas to get you started:

  • Adirondack Chair: This classic outdoor chair is perfect for relaxing on the porch or in the backyard. With a few basic tools and some lumber, you can build your own in just a few hours.
  • Garden Bench: A wooden bench is a lovely addition to any garden or patio. It's also a great project for beginners, as it requires only a few basic tools and materials.
  • Outdoor Table: Whether you need a small side table or a larger dining table, building your own outdoor table is a fun and rewarding project. You can customize the size and shape to fit your specific needs.

Step-by-Step Guide to Building Your Own Outdoor Furniture

Once you've chosen your project, it's time to get started. Here's a general guide to building your own outdoor furniture:

  1. Plan your project: Sketch out your design and make a materials list. Be sure to consider the size, shape, and function of your piece.

  2. Gather materials: Purchase all the necessary materials, including lumber, screws, and any hardware or finishing supplies.

  3. Cut and shape the wood: Use a saw to cut the wood to the appropriate lengths and shapes. Sand and smooth any rough edges.

  4. Assemble the pieces: Use screws or other fasteners to attach the pieces of wood together. Follow your design carefully, and double-check your work as you go.

  5. Sand and finish: Once your piece is assembled, sand it down to a smooth finish. Apply any finishes or stains as desired.

Conclusion

Building your own outdoor furniture is a fun and rewarding project that can save you money and give you a sense of pride and accomplishment. With a little effort and creativity, you can create beautiful and functional pieces that will last for years to come. So grab your tools and get started on your next DIY woodworking project!

{WRITING_STYLE}: This article provides detailed instructions for DIY woodworking projects for outdoor furniture, complete with step-by-step guides and materials lists. {WRITING_TONE}: Neutral.


Wednesday, February 15, 2023

DIY woodworking projects for gifts

Posted by with No comments

Woodworking is a popular hobby that has been around for centuries. It's a great way to create unique and personalized gifts for loved ones. Whether you're a beginner or an experienced woodworker, there are plenty of DIY woodworking projects that you can tackle to create one-of-a-kind gifts. In this article, we'll explore some easy-to-make woodworking gift ideas and provide step-by-step guides to help you bring these projects to life.

Crafting Personalized Gifts with DIY Woodworking Projects

Woodworking allows you to create personalized gifts that are both beautiful and functional. From cutting boards to picture frames, the possibilities are endless. Here are some step-by-step guides to help you create unique gifts for your loved ones.

Cutting Board

Materials:

  • Hardwood board (Maple, Walnut, Cherry, or Oak)
  • Mineral Oil
  • Sandpaper (80 grit and 120 grit)

Instructions:

  1. Cut the hardwood board to your desired size and shape.
  2. Sand the board with 80 grit sandpaper to remove any rough edges or splinters.
  3. Sand the board again with 120 grit sandpaper to create a smooth surface.
  4. Apply mineral oil to the board to protect the wood and enhance the grain.
  5. Let the board dry for 24 hours before use.

Picture Frame

Materials:

  • Pine board
  • Wood glue
  • Picture frame hangers
  • Glass
  • Backing board
  • Miter saw
  • Sandpaper (120 grit)

Instructions:

  1. Cut the pine board to the desired size and shape for your picture frame.
  2. Use a miter saw to cut the ends of the pine board at a 45-degree angle.
  3. Apply wood glue to the ends of the pine board and push them together to form a frame.
  4. Clamp the frame together and let it dry for 24 hours.
  5. Sand the frame with 120 grit sandpaper to create a smooth surface.
  6. Attach picture frame hangers to the back of the frame.
  7. Insert the glass and backing board into the frame.

Get Creative: Discover Easy-to-Make Woodworking Gifts

If you're looking for more woodworking gift ideas, here are some easy-to-make projects that you can try.

Wine Bottle Holder

Materials:

  • 1-inch thick board
  • Drill
  • Hole saw
  • Sandpaper (120 grit)
  • Saw

Instructions:

  1. Cut the board to your desired shape and size.
  2. Use a hole saw to drill holes in the board for the wine bottles.
  3. Sand the board with 120 grit sandpaper to create a smooth surface.
  4. Use a saw to cut a slot in the board for a wine glass.
  5. Insert the wine bottles and glass into the holder.

Coasters

Materials:

  • Cork board
  • Wood slices
  • Wood glue
  • Sandpaper (120 grit)

Instructions:

  1. Cut the cork board to the desired size and shape for your coaster.
  2. Glue the wood slice to the cork board.
  3. Sand the coaster with 120 grit sandpaper to create a smooth surface.
  4. Repeat for as many coasters as you need.

Woodworking is a great way to create personalized gifts that are both unique and functional. With these step-by-step guides and easy-to-make projects, you'll be able to impress your loved ones with your woodworking skills. Whether you're making cutting boards, picture frames, wine bottle holders, or coasters, there's a woodworking project for everyone. So get creative and start making!


Monday, February 13, 2023

Craft Your Way to Woodworking Bliss: DIY Projects Galore!

Posted by with No comments

Crafting is an excellent way to explore your creativity and create something unique while having fun. Woodworking is one of the most popular DIY crafts, and it's easy to see why. With a little bit of effort, you can transform your home, make custom furniture, and create one-of-a-kind gifts for your loved ones. In this article, we'll explore some fun and creative woodworking projects that you can take on at home. So, let's get started and craft your way to woodworking bliss!

Get Your Creativity Flowing: Woodworking DIY Projects!

Woodworking is a great way to unleash your creativity and create something beautiful and functional. Here's a step-by-step guide to creating your own set of wooden coasters:

Materials

  • 4” x 4” square piece of wood
  • Sandpaper
  • Wood stain
  • Paintbrush
  • Clear coat spray

Plans

  1. Sand the square piece of wood until it’s smooth.
  2. Apply a layer of wood stain to the entire piece and let it dry.
  3. Apply a second coat of stain if you want a darker finish.
  4. Once the stain has dried, apply a clear coat spray to protect the wood.

These wooden coasters are perfect for protecting your tabletops while adding a touch of rustic charm to your decor. You can customize them by using different types of wood and experimenting with different stains and finishes.

Transform Your Home With These Fun Woodworking Ideas!

If you're looking to transform your home with some fun and creative woodworking projects, here's an idea: create a set of floating shelves! Here's how:

Materials

  • 1x8x8 pine board
  • Saw
  • Drill
  • Screws
  • Wood glue
  • Sandpaper
  • Wood stain

Plans

  1. Cut the pine board into three pieces: one 24” piece and two 8” pieces.
  2. Sand the edges of the boards until they’re smooth.
  3. Apply a layer of wood stain to the entire piece and let it dry.
  4. Once the stain has dried, apply a second coat of stain if you want a darker finish.
  5. Glue the two 8” pieces to the ends of the 24” piece to create a rectangular shape.
  6. Screw the shelves into the wall using the drill and screws.

These floating shelves are a great way to add extra storage space while creating a unique and stylish look for your home. You can customize them by using different types of wood and experimenting with different stains and finishes.

Woodworking is an enjoyable and rewarding hobby that allows you to unleash your creativity while creating something unique and functional. With these fun and creative woodworking projects, you can transform your home and create one-of-a-kind gifts for your loved ones. So, grab your tools and get started on your woodworking journey today!


Build Your Own Cozy 2x4 Adirondack Bench - Free Plans!

Posted by with No comments

Build Your Own Cozy 2x4 Adirondack Bench - Free Plans!

Are you looking for a fun and easy DIY project to spruce up your outdoor space? Look no further than building your own cozy 2x4 Adirondack bench! With these free plans and step-by-step instructions, you'll have a beautiful and comfortable bench in no time. So grab your materials and let's get started!

Get ready to create your dream bench!

Before we dive into the step-by-step guide, let's make sure we have everything we need. Here's a list of materials you'll need:

  • 2x4 lumber (about 12-16 feet depending on the size of your bench)
  • Screws (2 1/2 inch)
  • Wood glue
  • Sandpaper (medium grit)
  • Paint or sealant (optional)

Once you have all your materials gathered, it's time to get started on building your dream bench!

Easy and fun DIY project with step-by-step instructions.

Step 1: Cut your wood into the following pieces:

  • 2 pieces at 38 1/2 inches (front legs)
  • 2 pieces at 23 1/2 inches (back legs)
  • 4 pieces at 21 inches (seat supports)
  • 2 pieces at 20 inches (arm rests)
  • 3 pieces at 48 inches (seat and back)

Step 2: Use wood glue and screws to attach the front and back legs together with the seat supports. Make sure the legs are perpendicular to the seat supports and the seat supports are flush with the top of the legs.

Step 3: Attach the arm rests to the front legs, making sure they are level and flush with the top of the front legs.

Step 4: Attach the seat and back pieces to the seat supports. Use wood glue and screws to secure them in place.

Step 5: Sand the entire bench with medium grit sandpaper to smooth any rough edges.

Step 6: Apply paint or sealant (optional) to protect your bench from the elements.

Congratulations! You have now built your very own cozy 2x4 Adirondack bench. Sit back, relax, and enjoy your new outdoor oasis.

Building your own cozy 2x4 Adirondack bench has never been easier or more fun. With these free plans and step-by-step instructions, you can create a beautiful and comfortable bench in just a few hours. So gather your materials, grab a friend or family member, and get building! Your outdoor space will thank you.


Sunday, February 12, 2023

Woodworking project ideas for small spaces

Posted by with No comments

Creative and Cheerful Woodworking Projects for Small Spaces

Are you a woodworking enthusiast but find that your small living space limits the size of your projects? Fear not, because we’ve rounded up some fun and creative woodworking project ideas that are perfect for small spaces! Whether you’re a beginner or a seasoned pro, these projects will keep you busy and satisfied with the end result.

Small Space, Big Creativity! Woodworking Project Ideas

Floating Shelves

Floating shelves are a great way to maximize storage space in a small area. With just a few pieces of wood, some screws, and a drill, you can create a stylish and functional floating shelf that can hold all your books, plants, and décor items. To create the shelves, measure and cut your wood pieces to the desired length, then attach them to the wall with screws and brackets.

Bedside Table

A bedside table is a must-have item in any bedroom, but it can take up a lot of space. With a little bit of woodworking know-how, you can create a slim and functional bedside table that fits perfectly in your small space. Use a saw to cut the wood into the desired shape, then sand and paint it to match your bedroom décor. Attach the legs using screws and brackets, and voila! You have a stylish and practical bedside table.

Wall Art

Why settle for plain walls when you can create your own unique wall art? With just a few pieces of wood, some paint or stains, and a little bit of creativity, you can create a one-of-a-kind piece of wall art that will brighten up any room. Cut your wood pieces into the desired shape, then sand and paint them to your liking. Arrange the pieces in a pattern or design that appeals to you, then attach them to the wall using screws or brackets.

Get Crafty: DIY Woodworking Projects for Small Spaces

Jewelry Organizer

A jewelry organizer is a great way to keep all your accessories in one place and prevent them from getting tangled or lost. With a few pieces of wood and some hooks or knobs, you can create a stylish and functional jewelry organizer that fits perfectly in your small space. Cut the wood into the desired shape, then sand and paint it to match your décor. Attach the hooks or knobs using screws, and you’re ready to organize your jewelry.

Floating Desk

A floating desk is a great way to create a workspace in a small area without taking up too much floor space. With a few pieces of wood, some screws, and brackets, you can create a stylish and practical floating desk that can be easily tucked away when not in use. Cut the wood into the desired shape and size, then attach it to the wall with brackets and screws. Add a chair, some décor items, and you have a functional workspace!

Plant Stand

Plants are a great way to add some greenery and life to a small space, but they can take up valuable floor space. With a little bit of woodworking skill, you can create a stylish and functional plant stand that elevates your plants and saves floor space. Cut the wood into the desired shape and size, then sand and paint it to match your décor. Attach the legs using screws and brackets, and you have a beautiful and practical plant stand.

Get Creative and Start Woodworking!

With these fun and creative woodworking project ideas for small spaces, you’ll never run out of things to create. Whether you’re a beginner or a seasoned pro, these projects are sure to keep you busy and happy with the end result. So go ahead, get creative, and start woodworking!


Craft Your Way to Joy: Beginner Woodworking Plans

Posted by with No comments

Craft Your Way to Joy with Beginner Woodworking Plans

Crafting with wood is not only a fun and creative hobby, but it can also be a great way to reduce stress and increase happiness. With beginner woodworking plans, anyone can learn how to make beautiful and useful items from wood, without any prior experience or specialized tools. In this article, we will guide you through the process of crafting your way to joy with step-by-step instructions and a list of materials and plans.

Happiness is a Plane Ride Away: Woodworking for Beginners

Woodworking can seem intimidating for beginners, but with the right guidance and tools, anyone can learn the basics and create something beautiful. Here is a step-by-step guide to help you get started:

Step-by-Step Guide:

  1. Choose your project: Start with a simple project such as a picture frame or a birdhouse.
  2. Gather your materials: You will need wood, saw, sandpaper, glue or nails, and any other materials specified in your plan.
  3. Cut the wood: Use your saw to cut the wood according to your plan.
  4. Sand the wood: Use sandpaper to smooth the edges and surfaces of your wood pieces.
  5. Assemble the pieces: Use glue or nails to assemble the pieces according to your plan.
  6. Finish your project: Apply a finish to protect and enhance the natural beauty of the wood.

Material List:

  • Wood: Choose a type of wood that is easy to work with, such as pine or poplar.
  • Saw: A handsaw or a table saw.
  • Sandpaper: A variety of grits, from coarse to fine.
  • Glue or nails: Choose a type of glue or nails that is appropriate for your project.
  • Finish: Choose a finish that is appropriate for your project, such as paint, stain, or varnish.

Plans:

There are many beginner woodworking plans available online or at your local hardware store. Look for plans that are easy to follow and provide detailed instructions and diagrams. Some popular beginner projects include:

  • Picture frames
  • Birdhouses
  • Jewelry boxes
  • Cutting boards
  • Planters

From Dust to Delight: The Joy of Crafting with Wood

Crafting with wood can be a satisfying and rewarding hobby, as you turn raw materials into something beautiful and useful. Here are some tips to help you get the most joy out of your woodworking projects:

Step-by-Step Guide:

  1. Choose your project: Choose a project that inspires you and matches your skill level.
  2. Set up your workspace: Make sure you have enough space and lighting to work comfortably.
  3. Take your time: Woodworking requires patience and attention to detail. Take your time and enjoy the process.
  4. Learn from your mistakes: Don't be discouraged by mistakes. Learn from them and use them to improve your skills.
  5. Share your work: Share your work with family and friends, or post it on social media to inspire others.

Material List:

In addition to the materials listed above, there are some additional tools and materials that can enhance your woodworking experience:

  • Workbench: A sturdy workbench is essential for woodworking.
  • Clamp: A clamp can hold your wood pieces together while you work.
  • Chisels: Chisels can be used to carve and shape wood.
  • Router: A router can be used to create decorative edges and details.

Plans:

As you gain more experience, you can move on to more complex woodworking projects. Some popular intermediate and advanced projects include:

  • Bookcases
  • Chairs
  • Tables
  • Cabinets
  • Wooden toys

Craft Your Way to Joy with Beginner Woodworking Plans

Woodworking is a fun and creative way to reduce stress and increase happiness. With beginner woodworking plans, anyone can learn how to make beautiful and useful items from wood. Whether you are a beginner or an experienced woodworker, there is always something new to learn and create. So pick up your saw, grab some wood, and craft your way to joy!


Saturday, February 11, 2023

Round up the Fun with an Octagonal Picnic Table!

Posted by with No comments

Round up the Fun with an Octagonal Picnic Table!

If you are looking for a fun and functional addition to your outdoor space, an octagonal picnic table might be just the thing you need! This unique table shape provides ample seating space for friends and family to gather around and enjoy a meal or a game night. In this article, we will guide you through the steps of building your very own octagonal picnic table, from materials to plans.

Get Your Friends and Family Together with an Octagonal Picnic Table!

The first step in building your octagonal picnic table is to gather all the necessary materials. You will need eight 2x4s for the frame, eight 2x6s for the tabletop and seats, and four 4x4s for the legs. You will also need screws, a saw, a drill, and a measuring tape.

Once you have all your materials, it's time to start building! Begin by constructing the frame of the table using the 2x4s. Cut each board to the desired length, then use the screws to attach them together in an octagonal shape. Next, add the legs to the frame using the 4x4s. Be sure to measure and cut each leg to the same length to ensure stability.

With the frame and legs in place, it's time to add the tabletop and seats. Cut each 2x6 to the desired length, then attach them to the frame using screws. Be sure to space the boards evenly and leave a small gap between each board to allow for water drainage. Finally, sand down any rough edges and give your new octagonal picnic table a coat of paint or stain to protect it from the elements.

Make Outdoor Dining an Adventure with a Fun and Functional Octagonal Table!

An octagonal picnic table is not only functional but also adds a unique touch to your outdoor space. It's a great way to make outdoor dining an adventure and bring friends and family together. With a little bit of time and effort, you can build your own octagonal picnic table that will last for years to come.

When planning your octagonal picnic table, be sure to consider the size of your space and how many people you want to accommodate. You can also customize your table by adding an umbrella hole, cup holders, or even a built-in cooler. The possibilities are endless!

So what are you waiting for? Round up the fun and start building your very own octagonal picnic table today!

Building an octagonal picnic table is a fun and rewarding project that will provide you with years of outdoor dining and entertainment. With our step-by-step guide, material list, and plans, you'll be able to build a table that is both functional and stylish. So grab your tools and get started on your new outdoor adventure today!


Thursday, February 9, 2023

Punch up your picnic with these playful table designs

Posted by with No comments

Punch up your picnic with these playful table designs ===

Picnics are a great way to enjoy the outdoors with family and friends. And what better way to make your picnic even more fun and memorable than by creating a playful and festive atmosphere at your picnic table? In this step-by-step guide, we’ll show you how to take your regular picnic table and transform it into a colorful, vibrant centerpiece that’s sure to make your guests smile.

Pick a Picnic Table Personality!

The first step in creating a playful picnic table is to decide on a theme. Whether you want to go bold and colorful or opt for a more subtle, rustic look, there are plenty of options to choose from. Some popular themes include beach-inspired, floral, patriotic, and rustic. Once you’ve chosen your theme, it’s time to gather your materials.

Creative Ideas to Make Your Picnic Table Pop!

To create a playful picnic table, you’ll need a few basic materials, including paint, brushes, stencils, and tape. You may also want to consider adding some decorative elements, such as flowers, lanterns, or even a whimsical tablecloth. Once you’ve gathered your materials, it’s time to get started.

Step-by-Step Guide:

  1. Clean your picnic table thoroughly, removing any dirt or debris.

  2. If you’re painting your table, sand it lightly to create a smooth surface for painting.

  3. Apply a coat of primer to your table to help the paint adhere better.

  4. Once the primer has dried, it’s time to start painting. Use your chosen colors to create a playful design on the table. You can use stencils or freehand your design, depending on your skill level.

  5. Once the paint has dried, you can add some finishing touches, such as decorative elements or a clear coat of sealant to protect the paint.

With these simple steps, you’ll be able to create a playful and festive picnic table that’s sure to make your next outdoor gathering a hit.

Now that you’ve learned how to create a playful picnic table, it’s time to get started! Whether you’re hosting a family BBQ, a birthday party, or just a casual picnic with friends, a fun and festive table design is sure to make your event even more special. So grab your paintbrushes and get creative – the possibilities are endless!


Sunday, February 5, 2023

DIY Delight: Build Your Own Cozy 2x4 Chair!

Posted by with No comments

Get Cozy: Build Your Own 2x4 Chair!

Are you looking for a simple and fun DIY project that will let you build your own cozy chair? Look no further than this step-by-step guide to building your own 2x4 chair! With just a few materials and some basic tools, you can create a comfortable and stylish chair that will be the envy of all your friends.

This guide will take you through the steps necessary to build your own 2x4 chair, from gathering the necessary materials to assembling the final product. Whether you're an experienced DIY enthusiast or a beginner looking for a fun and simple project, this guide has everything you need to get started.

So grab your tools and get ready to create your own cozy chair that you can enjoy for years to come!

DIY Delight: Create Your Own Comfy Seat!

Step-by-Step Guide

Step 1: Gather your materials. For this project, you will need:

  • 4 8-foot 2x4s
  • Measuring tape
  • Circular saw
  • Drill
  • Screws
  • Sandpaper

Step 2: Cut your 2x4s to size. Using your measuring tape and circular saw, cut each of your 2x4s into the following pieces:

  • 2 pieces at 30 inches for the front and back legs
  • 2 pieces at 22 inches for the side legs
  • 2 pieces at 23 inches for the seat
  • 2 pieces at 20 inches for the backrest
  • 2 pieces at 15 inches for the armrests

Step 3: Sand your pieces. Using sandpaper, sand the edges and surfaces of each piece until they are smooth and free of rough spots.

Step 4: Assemble the chair. Using screws and your drill, attach the front and back legs to the side legs. Then attach the seat and backrest, followed by the armrests.

Step 5: Sand the finished product. Once your chair is assembled, sand any rough spots or edges until the entire chair is smooth and comfortable.

Material List

  • 4 8-foot 2x4s
  • Measuring tape
  • Circular saw
  • Drill
  • Screws
  • Sandpaper

Plans

  • 2 pieces at 30 inches for the front and back legs
  • 2 pieces at 22 inches for the side legs
  • 2 pieces at 23 inches for the seat
  • 2 pieces at 20 inches for the backrest
  • 2 pieces at 15 inches for the armrests

In just a few simple steps, you can create your own cozy chair that will be the perfect addition to any room in your home. With its sturdy construction and comfortable design, this 2x4 chair is sure to become your new favorite spot to relax and unwind.

So why wait? Gather your materials, grab your tools, and get started on building your own cozy 2x4 chair today!


Wednesday, February 1, 2023

Squirrel Feast: DIY Picnic Table Plans for Your Furry Friends!

Posted by with No comments

Squirrel Feast: DIY Picnic Table Plans for Your Furry Friends! ===

Tired of seeing your furry friends struggle to find a comfortable spot to have their meals? Look no further! We have the ultimate guide to feeding your squirrels in style with these DIY picnic table plans. Not only will your furry friends love their new dining area, but it will also add a charming touch to your garden. Get ready to impress your little buddies with this easy-to-build picnic table!

The Ultimate Guide to Feeding Your Furry Friends in Style!

Squirrels are known for their love for nuts and seeds, and with this DIY picnic table, you can provide them with their very own dining area. Here's a step-by-step guide to building the perfect picnic table for your furry friends.

Step-by-Step Guide:

  1. Start by gathering your materials. You will need wood pieces, screws, nails, a saw, a drill, and sandpaper.

  2. Cut the wood pieces according to the plan.

  3. Sand the edges and corners of the wood pieces to make them smooth.

  4. Assemble the picnic table according to the plan, using screws and nails to hold the pieces together.

  5. Once the table is assembled, sand it down to remove any rough spots.

  6. Give your new picnic table a coat of paint or stain to protect it from the elements.

  7. Add a bowl of nuts and seeds to the table, and watch your furry friends enjoy their new dining area!

Material List:

  • 3 pieces of 2x4 lumber, 8 feet long
  • 1 piece of 1x4 lumber, 8 feet long
  • Screws and nails
  • Sandpaper
  • Paint or stain

Plans:

Here's what your picnic table should look like when it's finished:

Picnic Table Plan

Get Creative with These DIY Picnic Table Plans for Squirrels!

Now that you know how to build a basic picnic table, it's time to get creative! Here are some ideas for customizing your squirrel picnic table:

  • Paint the table in bright colors to make it stand out in your garden.
  • Add a little roof to the table to protect your furry friends from the rain.
  • Use different types of wood to give your table a unique look.
  • Add a small decoration, like a squirrel statue, to make the table even more inviting for your furry friends.

The possibilities are endless when it comes to customizing your squirrel picnic table. Get creative and have fun building the perfect outdoor dining area for your furry friends.

There you have it! With this DIY squirrel picnic table, you can provide your little buddies with a fun and stylish place to enjoy their meals. So gather your materials, follow the plans, and get ready to impress your furry friends with this charming addition to your garden. Happy building!


Monday, January 30, 2023

Pack a Picnic: Build Your Own Folding Table!

Posted by with No comments

Get Ready for Outdoor Fun!

Summer is here, and it's time to enjoy the beautiful weather with outdoor activities. A picnic is a perfect way to spend time with family and friends while enjoying the great outdoors. But to have an enjoyable picnic, you need a good picnic table. In this article, we will guide you through the process of building your own folding picnic table that will make your outdoor activities more comfortable and enjoyable.

Step-by-Step Guide

Building a picnic table may seem daunting, but with our step-by-step guide, you'll have your own table in no time. Here are the steps:

  1. Gather your materials - You will need some plywood, two-by-fours, screws, hinges, and some tools such as a saw, drill, and measuring tape.

  2. Cut the wood - Use the saw to cut the plywood and two-by-fours into the required pieces. Follow the measurement plans to ensure that the pieces are cut to the right size.

  3. Assemble the tabletop - Screw the plywood pieces together to form the tabletop. Make sure to sand the top smooth to avoid splinters.

  4. Build the legs - Attach the two-by-fours to form the legs. Then attach the hinges to the legs and tabletop to allow for folding.

  5. Attach the legs to the tabletop - Screw the legs to the tabletop, making sure they are secure.

  6. Finish - Sand and paint the table to give it a finished look.

Material List

  • 2 pieces of 4'x8' plywood
  • 6 pieces of 2"x4"x8' lumber
  • 2 1/2" screws
  • Hinges
  • Sandpaper
  • Paint

Plans

  • Top - 30"x72"
  • Long apron - 30"x69"
  • Short apron - 30"x28"
  • Legs - 28 1/2"

Building your own folding picnic table is a fun DIY project that will save you money and give you a sense of satisfaction. With our step-by-step guide, materials list, and plans, you can have your own table in no time. So, pack your picnic basket, grab your new table, and head out to enjoy some outdoor fun!


Saturday, January 28, 2023

DIY Delight: Free 2x4 Adirondack Chair Plans!

Posted by with No comments

DIY Delight: Free 2x4 Adirondack Chair Plans!

Looking for a fun and creative way to spruce up your outdoor space? Why not build your very own Adirondack chair! With these free plans, you can create a stylish and comfortable chair that you'll be able to enjoy for years to come. So, grab your tools and let's get started!

Get Ready to Lounge in Style! 🌞

There's nothing quite like relaxing in a comfortable chair while enjoying the great outdoors. With these free Adirondack chair plans, you'll be able to create a stylish and comfortable seat that is perfect for lounging in the sun. Whether you're reading a book, sipping on a cold drink, or just enjoying the view, this chair is sure to become your new favorite spot.

Build Your Own Adirondack Chair with These Free Plans 🛠️

Before you get started, you'll need to gather your materials. You'll need 2x4s for the frame and armrests, as well as 1x4s for the seat and backrest. You'll also need screws, wood glue, sandpaper, and a saw. Once you have everything you need, it's time to get started!

Step-by-Step Guide

  1. Cut your 2x4s into the following pieces:
    • 2 front legs (22.5 inches each)
    • 2 back legs (36 inches each)
    • 2 armrests (27.5 inches each)
    • 1 front brace (23.5 inches)
    • 1 back brace (29 inches)
  2. Cut your 1x4s into the following pieces:
    • 5 seat slats (22.5 inches each)
    • 3 backrest slats (29 inches each)
  3. Sand all of your pieces until they are smooth.
  4. Attach the front legs to the front brace using screws and wood glue.
  5. Attach the back legs to the back brace using screws and wood glue.
  6. Attach the front and back leg assemblies together using the armrests.
  7. Attach the seat slats to the frame using screws and wood glue.
  8. Attach the backrest slats to the frame using screws and wood glue.

Material List

  • 2x4s (untreated pine)
  • 1x4s (untreated pine)
  • Screws (2.5 inches)
  • Wood glue
  • Sandpaper
  • Saw

Plans

You can find the detailed plans for this Adirondack chair at the following link: Free 2x4 Adirondack Chair Plans.

With these free plans, you'll be able to create a beautiful Adirondack chair that is perfect for your outdoor space. So, grab your tools and get started today! Not only will you have a comfortable and stylish seat, but you'll also have the satisfaction of knowing that you built it yourself. Happy building!