Step 1: Determine Shed Size and Style
- Consider what items you will be storing and how much space you will need
- Research various shed styles and choose one that fits your needs and aesthetic preferences then lets continue to Build Storage Shed
Step 2: Select Materials and Foundation Type
- Choose from common shed building materials such as wood, metal, or vinyl
- Decide on a foundation type, such as a concrete slab or wood frame with a skid foundation
Step 3: Prepare Foundation
- Clear and level the area where the shed will be built
- If building on a concrete slab, pour and level the concrete according to local building codes
- If building on a wood frame, lay down a layer of gravel and install concrete pier blocks at each corner and at regular intervals along the perimeter of the frame
Step 4: Build the Frame
- Using the shed plans, measure and cut lumber to the appropriate size
- Assemble the frame according to the shed plans
Step 5: Install Siding and Roofing
- Cut and install the siding according to the shed plans
- Cut and install the roofing material, ensuring proper overlap and fastening
Step 6: Add Doors and Windows
- Install the doors and windows according to the shed plans
- Ensure that they are properly secured and sealed against the weather
Step 7: Install Interior Sheathing
- Measure and cut interior sheathing material to fit the walls and ceiling of the shed
- Install the sheathing, making sure to leave room for electrical wiring and insulation if desired
Step 8: Finish the Shed
- Trim and paint or stain the shed to your desired finish
- Add any additional features or accessories, such as shelving, hooks, or lighting
Step 9: Organize the Shed
- Place items in the shed in an organized and efficient manner
- Consider adding labels or storage containers to keep items easily accessible and visible
Step 10: Enjoy Your New Storage Space!
- Use your new shed to store tools, equipment, or other items
- Enjoy the added space and organization in your outdoor area
Materials List
Before starting your shed project, it's important to gather all necessary materials. Here's a list of materials you'll need:- Pressure-treated 4x4s for the foundation
- 2x4s for framing the walls, roof, and door
- Exterior grade plywood for sheathing
- Roofing materials, such as shingles or metal roofing
- Exterior grade siding or cladding material
- Windows and door
- Nails and screws
- Construction adhesive and sealant
- Paint or stain
Plans and Diagrams
To help you visualize the shed project and ensure proper construction, it's important to have detailed plans and diagrams. You can find these online or in books, or you may choose to create your own. Here are some common shed plans:- Gable roof shed
- Lean-to shed
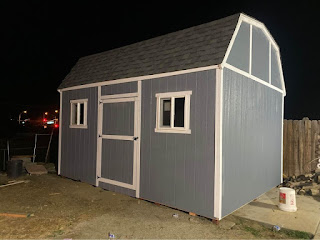
- Barn-style shed
- Colonial-style shed
Additional Tips
Here are some additional tips to keep in mind as you build your storage shed:- Always wear safety gear, such as goggles and gloves
- Consult local building codes and obtain necessary permits before starting construction
- Consider hiring a professional if you're unsure about any part of the construction process
- Take your time and don't rush the project, as mistakes can be costly and time-consuming to fix
- Enjoy the process and the satisfaction of creating your own outdoor storage space!
PDF Materials List and Plans
To make things easier, we have provided a downloadable PDF materials list and plans for a 10x10 storage shed. This shed is perfect for beginners and provides ample storage space.Conclusion
Building your own storage shed can be a fun and rewarding project. With the right materials, plans, and guidance, even beginners can successfully construct a shed for their outdoor storage needs. Remember to take your time, follow each step carefully, and always prioritize safety. By following these instructions and tips, you'll have a new storage shed in no time!
March 20, 2023